Gallery:Holy Quintet: Difference between revisions
| (19 intermediate revisions by the same user not shown) | |||
| Line 8: | Line 8: | ||
</gallery> | </gallery> | ||
===Art by | ===Art by Other Artists=== | ||
<gallery> | <gallery> | ||
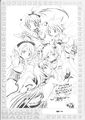
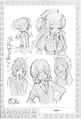
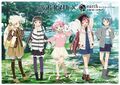
File:Rakugaki_Note_Hiroki_Yamamura.jpg|From the [[Rakugaki Note]] by Hiroki Yamamura | File:Rakugaki_Note_Hiroki_Yamamura.jpg|From the [[Rakugaki Note]] by Hiroki Yamamura | ||
| Line 29: | Line 29: | ||
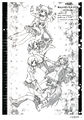
File:Tiro_Finale_Nobuhiro_Sugiyama.jpg|Art by Nobuhiro Sugiyama | File:Tiro_Finale_Nobuhiro_Sugiyama.jpg|Art by Nobuhiro Sugiyama | ||
File:018_Tiro_Finale_Naoyuki_Tatsuwa.jpg|Art by Naoyuki Tatsuwa | File:018_Tiro_Finale_Naoyuki_Tatsuwa.jpg|Art by Naoyuki Tatsuwa | ||
File:Megami_08.2011_Scan_10.jpg|Art by CHAN×CO | |||
</gallery> | </gallery> | ||
| Line 64: | Line 66: | ||
File:Madoka_BD_Box_cover.jpg | File:Madoka_BD_Box_cover.jpg | ||
File:Madoka_Movie_DVD_1_cover.jpg | File:Madoka_Movie_DVD_1_cover.jpg | ||
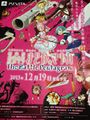
File:The Rebellion Story Key Visual 02.jpg | |||
</gallery> | </gallery> | ||
| Line 77: | Line 80: | ||
<gallery> | <gallery> | ||
File:The_Different_Story_3_Cover.jpg|From [[The Different Story]] | File:The_Different_Story_3_Cover.jpg|From [[The Different Story]] | ||
File:TDS_Illustration.jpg | |||
File:H426780342.2.jpg | |||
File:Different_story_3_art.jpg | File:Different_story_3_art.jpg | ||
File:Tumblr_opupykIdkr1w8x2g9o1_1280.jpg | |||
File:3vol.jpg | |||
</gallery> | </gallery> | ||
| Line 102: | Line 109: | ||
===Magazines=== | ===Magazines=== | ||
<gallery> | <gallery> | ||
File:NyanType_05.2011_sleepover.jpg | |||
File:MM_10.2011_01.jpg | |||
File:Megami_01.2012_poster.jpg | |||
File:Animedia_2012-02_03.jpg | |||
File:Kirara_Magica_Rebellion_Stitch.jpg | File:Kirara_Magica_Rebellion_Stitch.jpg | ||
File:NewType_2012-07_Illustration.jpg | |||
File:NewType_2012-09_01.jpg | |||
File:NewType_2012-11_Illustration.jpg | |||
File:NewType_2012-12_Illustration.jpg | |||
File:Sports_Hochi_Madoka_Special_1_Illustration.jpg | |||
File:Kirara Magica Vol 3 Bonus Front.jpg | |||
File:Manga_Time_Kirara_Magica_Vol.7_cover.jpg | |||
File:Kirara Magica Vol 14 Cover.jpg | |||
</gallery> | </gallery> | ||
| Line 125: | Line 144: | ||
File:Bookstore_vol_1.jpg|From Come in! Magica Bookstore | File:Bookstore_vol_1.jpg|From Come in! Magica Bookstore | ||
File:PMMM_4Koma_Anthology_1_Cover.jpg|From the [[Puella Magi Madoka Magica 4Koma Anthology 1|4Koma Anthology]] | File:PMMM_4Koma_Anthology_1_Cover.jpg|From the [[Puella Magi Madoka Magica 4Koma Anthology 1|4Koma Anthology]] | ||
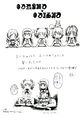
File:4koma_Anthology_Illustrations_(7).jpg|From the [[Puella Magi Madoka Magica 4Koma Anthology 4|4Koma Anthology volume 4]] | |||
File:Guidebook_Early_Illustrations_12.jpg|From the Guidebook | File:Guidebook_Early_Illustrations_12.jpg|From the Guidebook | ||
File:MovieMaterialBook024.jpg | File:MovieMaterialBook024.jpg | ||
| Line 134: | Line 154: | ||
File:Madoka_Rebellion_Guidebook_Only_You_Cover.jpg | File:Madoka_Rebellion_Guidebook_Only_You_Cover.jpg | ||
File:Key_Animation_Note_1_Cover.jpg|From the Key Animation Note | File:Key_Animation_Note_1_Cover.jpg|From the Key Animation Note | ||
File:PMMM Anthology 13.jpg|Art from [[Puella Magi Madoka Magica Anthology 1]] | |||
File:Madoka A 1 005.jpg | |||
File:Shopped 2.jpg | |||
</gallery> | </gallery> | ||
| Line 204: | Line 227: | ||
File:51108_hanabi1.jpg | File:51108_hanabi1.jpg | ||
File:Memoria_1917.jpg | File:Memoria_1917.jpg | ||
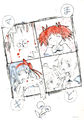
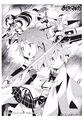
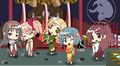
File:Film13_scene19_01.jpg|The group after killing [[Sayaka Miki (Scene 0 ver.)|Sayaka]], mirroring a similar scene in [[Episode 10]] of the original anime. | |||
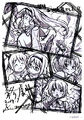
File:Film14_scene34.jpg|The group in [[Scene 0]]'s ending. | |||
</gallery> | |||
===[[Magia Exedra]]=== | |||
<gallery> | |||
File:Magia_Exedra_KV1_PC.jpg | |||
</gallery> | </gallery> | ||
| Line 217: | Line 247: | ||
</gallery> | </gallery> | ||
==Merchandise and Collaborabtions== | |||
==Merchandise and | |||
===Merchandise=== | ===Merchandise=== | ||
<gallery> | <gallery> | ||
| Line 252: | Line 281: | ||
</gallery> | </gallery> | ||
=== | ===Collaborations=== | ||
<gallery> | <gallery> | ||
File:Sapporosnowfest1.jpg | File:Sapporosnowfest1.jpg | ||
| Line 269: | Line 298: | ||
File:Animate_fair_2022_summer_from_Movic.jpg | File:Animate_fair_2022_summer_from_Movic.jpg | ||
File:Don_Quijote_collabo.png | File:Don_Quijote_collabo.png | ||
File:ArteryGear1.jpg|Artery Gear | |||
File:ArteryGear2.jpg | |||
File:GunGirlsZGroup.jpg | |||
File:Logres_art.jpg | |||
File:Logres_3.png | |||
</gallery> | </gallery> | ||
Latest revision as of 14:23, 26 April 2024
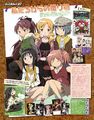
The gallery for the Holy Quintet group is found here.
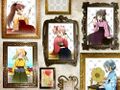
Official Art
Posters


Art by Other Artists
From the Rakugaki Note by Hiroki Yamamura
Art by Ryutaro Minagawa
Art by Akihisa Takano
Art by Yasutoshi Iwasaki
Art by Hirotoshi Arai
Art by Tatsuya Shiraishi
Art by Shinji Itadaki
Art by Kosuke Murayama

Art by Hanokage
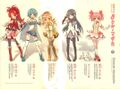
Art by PAPA

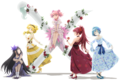
Art by Sadoru Chiba
Art by Ume Aoki from the Tiro Finale Book
Art by Yoshiharu Ashino
Art by Ryo Imamura
Art by Kenichi Kutsuna
Art by Shinsaku Sasaki
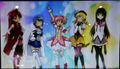
Art by Akiyuki Shinbo
Art by Nobuhiro Sugiyama

Art by Naoyuki Tatsuwa

Art by CHAN×CO


Official Art


Screenshots
Original Anime
Episode 11 end card

Episode 12 end card


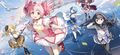
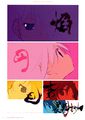
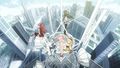
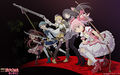
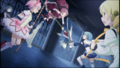
Rebellion
The Holy Quintet in Rebellion


Magia Record Anime


BluRays/DVDs


Books/Magazines
Madoka Magica Manga


The Different Story
From The Different Story


Rebellion Manga


Novel
From the novel


Magazines


Other

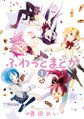
From Homura Tamura
From Floating Madoka

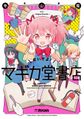
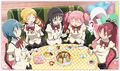
From Come in! Magica Bookstore

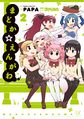
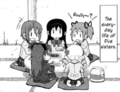
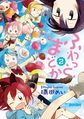
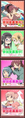
From the 4Koma Anthology
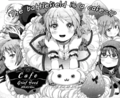
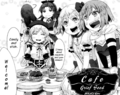
From the 4Koma Anthology volume 4

From the Guidebook

From the Key Animation Note


.jpg)


Games
Madoka Magica Online
Art for Madoka Magica Online


Madoka Magica Mobage
From Madoka Magica Mobage


Madoka Magica Portable
From Madoka Magica Portable


Madoka Magica: The Battle Pentagram

Art from Battle Pentagram
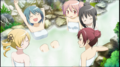


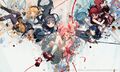
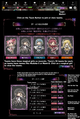
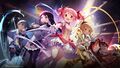
Magia Record
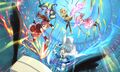
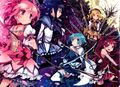
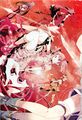
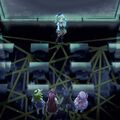
The group fighting H.N. Elly

The group after killing Sayaka, mirroring a similar scene in Episode 10 of the original anime.
The group in Scene 0's ending.


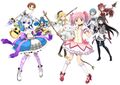
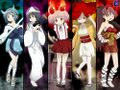
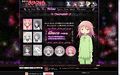
Magia Exedra

Other


Merchandise and Collaborabtions
Merchandise


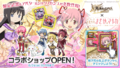
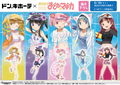
Collaborations


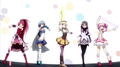
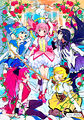
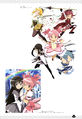
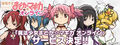
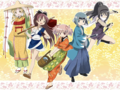
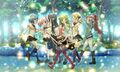
The Quintet in Monogatari outfits from the Madogatari collab


Artery Gear